Everyone tells you that warm chocolate lava cake needs fancy equipment or restaurant-level skills. That’s completely wrong. I used to believe it too—until I realized the real secret isn’t technique. It’s knowing when to stop.
Most home cooks either bake it too long (turning it into regular cake) or too short (leaving it raw in the middle). There’s this tiny window where magic happens. The edges set while the center stays almost molten. That’s it.
The smell alone will pull people into your kitchen before they even know what’s happening. That rich, buttery chocolate aroma hits different when you know you made it yourself. Pin this for your next cozy dessert night—it’s ready in under 35 minutes from start to finish.
Want to know why your friends’ lava cakes never impressed? Keep reading. I’m about to walk you through exactly what everyone’s doing wrong, and how to get it right every single time.
What everyone gets wrong about warm chocolate lava cake
Here’s the thing: most recipes tell you to bake it at high heat for way too long. They think a higher temperature means a better crust. Wrong. You end up with a rubbery cake shell and a center that’s either soup or concrete.
The real move is moderate heat with precise timing. You want the edges cooked through but the center still moving slightly when you shake the pan. That’s when you pull it out.
Why this method wins:
- Lower oven temperature means the center stays molten while edges actually set properly
- You get that golden crust without the rubbery texture people complain about
- The warm chocolate lava cake stays perfect for eating for a solid 5 minutes (not 30 seconds)
- Less guessing—you’ll know exactly when it’s done by feel, not just time
Ingredients for warm chocolate lava cake
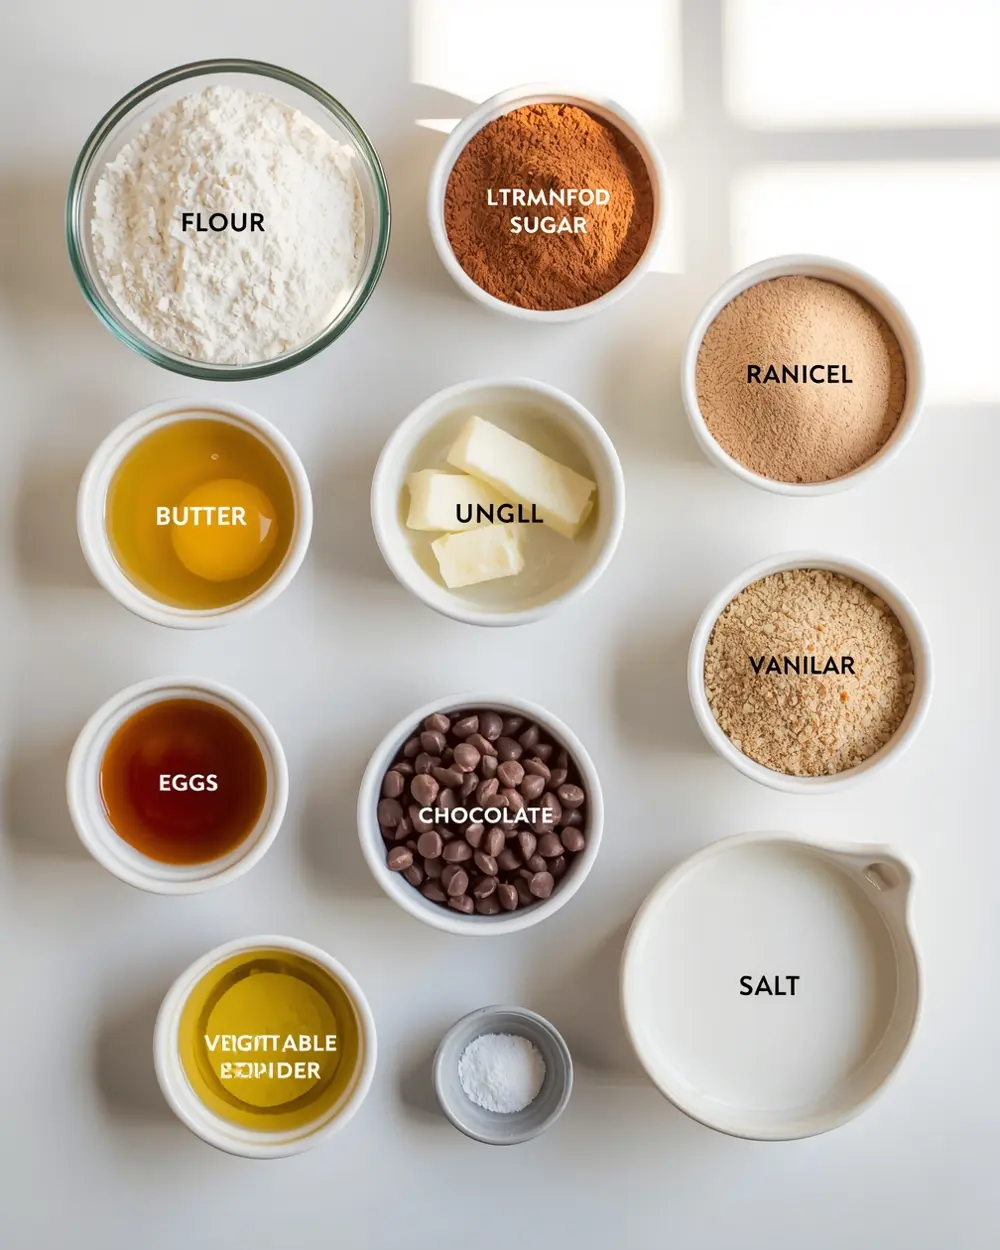
- 1 1/2 cups all-purpose flour
- 1/2 cup unsweetened cocoa powder
- 1 cup granulated sugar
- 1/2 cup brown sugar
- 1/2 cup butter
- 2 large eggs
- 1 tsp vanilla extract
- 1/2 cup whole milk
- 1/2 cup semi-sweet chocolate chips
- 1/4 tsp baking powder
- 1/4 tsp salt
- 1 tbsp vegetable oil
The semi-sweet chocolate chips are the star ingredient here. You want them slightly firm but not rock-hard—that creamy, almost velvety texture when you bite into one is what you’re going for. Room temperature is perfect.
Step-by-step instructions
1. Preheat your oven to 350°F. Mix the flour, cocoa powder, granulated sugar, brown sugar, baking powder, and salt in a large bowl. Whisk it together for about 30 seconds—you want everything evenly distributed. This step matters because lumpy cocoa powder ruins the texture of your warm chocolate lava cake.
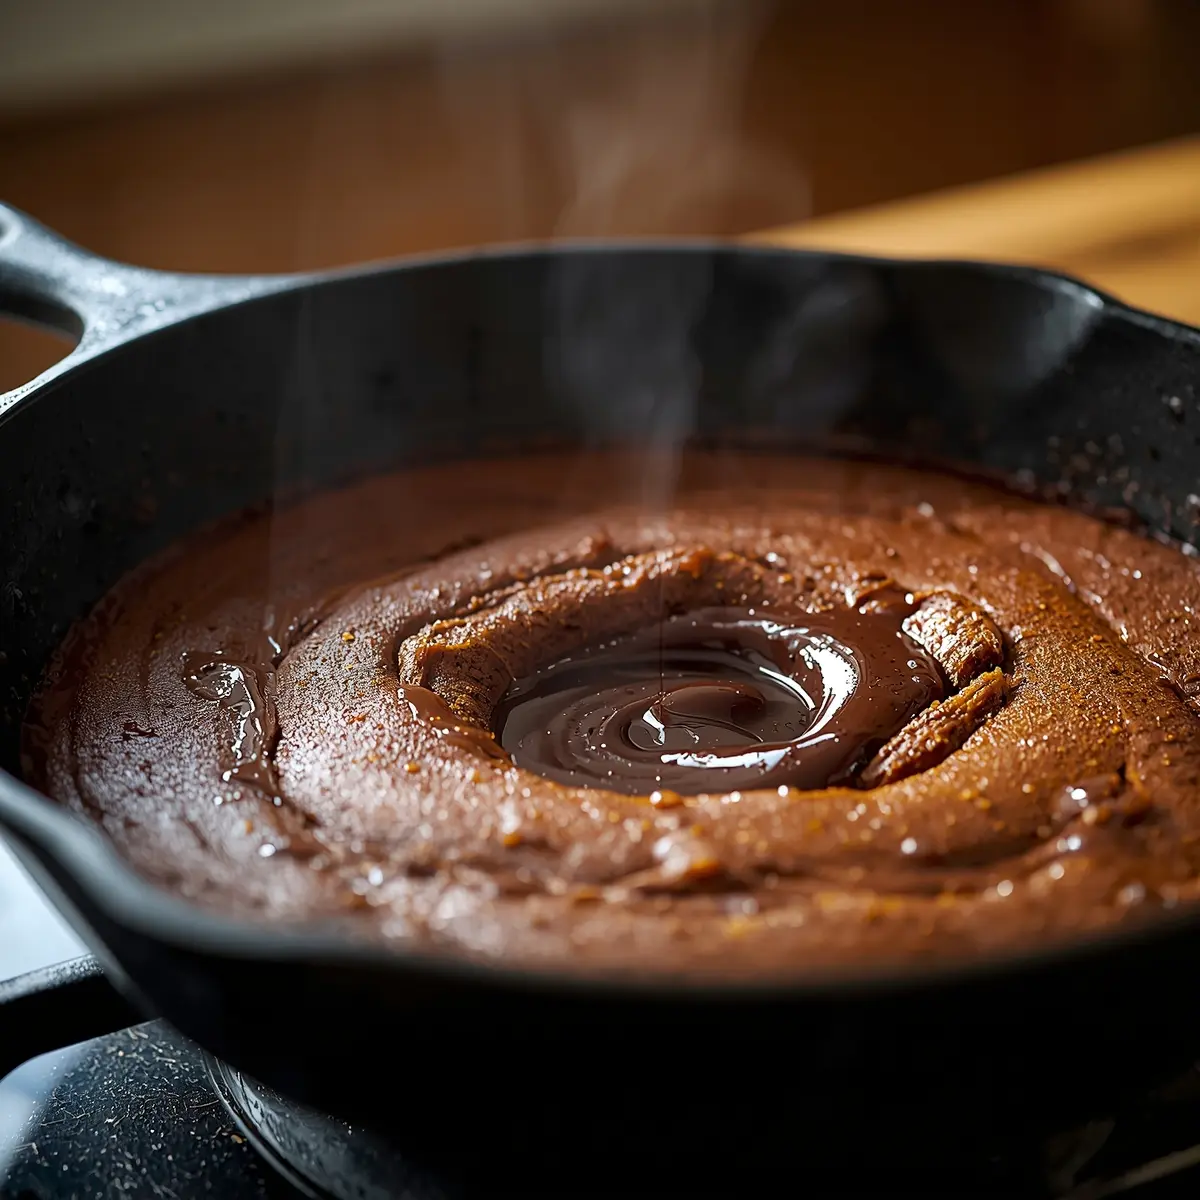
2. Melt the butter in a small saucepan over low heat. Add the eggs and vanilla extract to your dry mixture, then pour in the melted butter. Stir everything together until just combined—don’t overmix or you’ll develop too much gluten and lose that tender crumb.
3. Fold in the chocolate chips gently with a spatula. You’ll hear the batter sizzle slightly as the warm mixture hits the chips. Add the milk and vegetable oil, stirring until the batter reaches a thick, pourable consistency. This is your moment to taste and adjust sweetness if needed.
4. Grease a 9-inch round baking dish with butter or cooking spray. Pour the batter in and smooth the top with the back of a spoon. Don’t worry if it looks thick—that’s exactly what you want. The chocolate chips will sink as it bakes, creating those pockets of molten goodness.
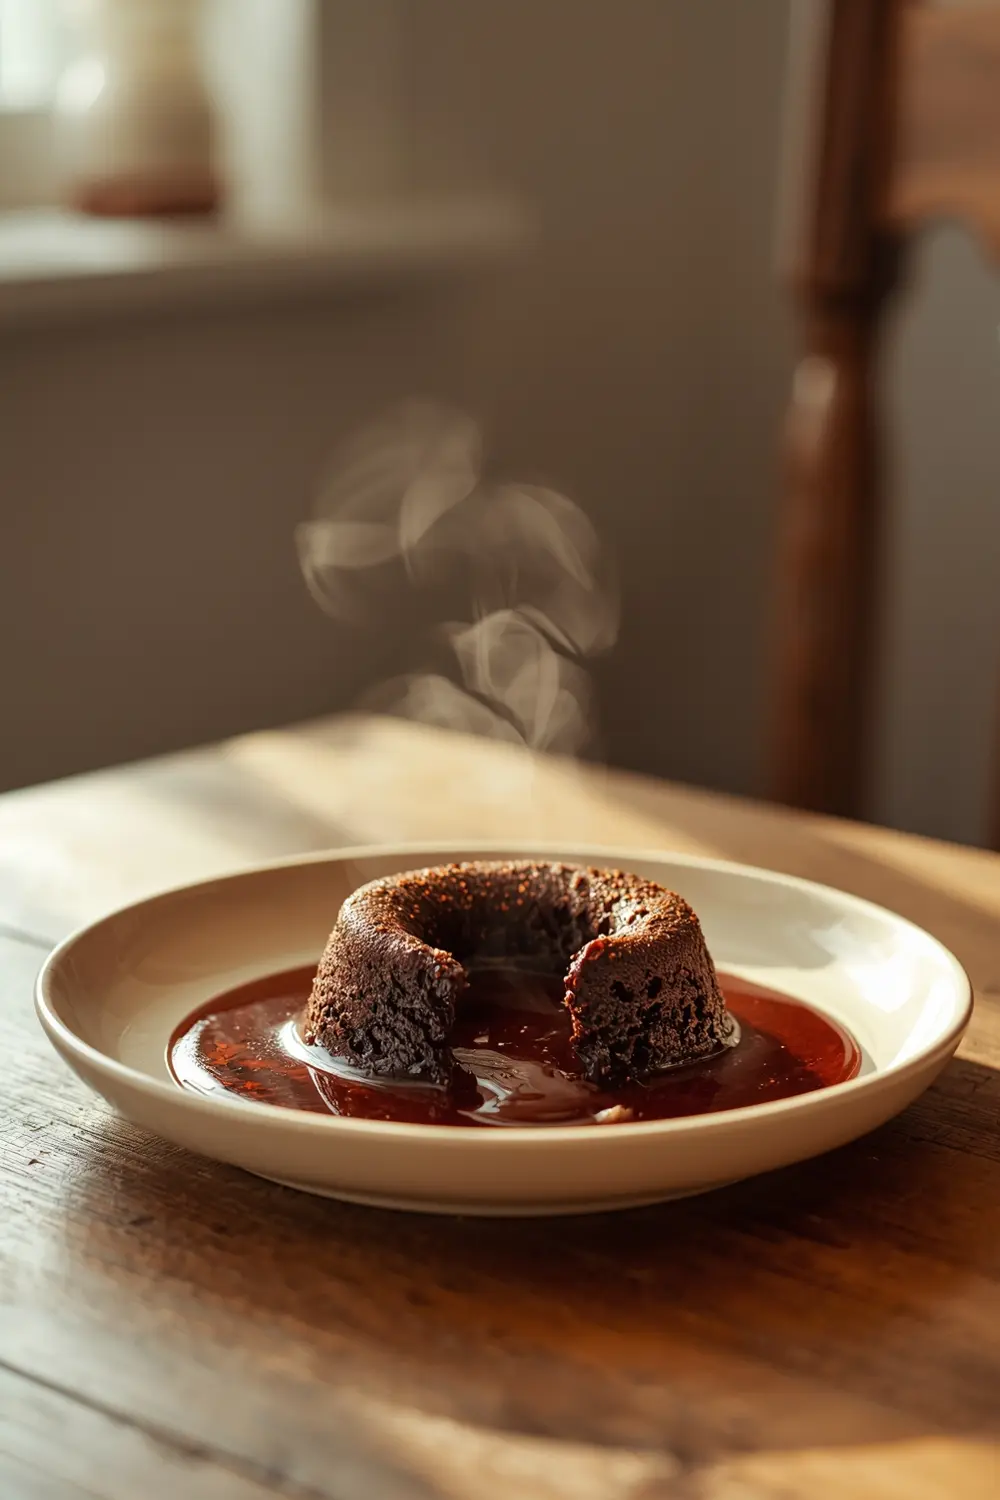
5. Slide the pan into the 350°F oven. Set your timer for exactly 12 minutes. I know that sounds short, but that’s the whole secret. Most people overbake because they’re nervous, then complain their warm chocolate lava cake turned into regular cake.
6. When your kitchen starts smelling like warm, buttery chocolate with just a hint of caramel, you’re about 30 seconds away from done. That rich, toasty aroma is your signal. The top should look set but still slightly jiggly in the absolute center when you gently shake the pan.
7. Remove the pan from the oven and let it rest for exactly 2 minutes. This is non-negotiable—it lets the structure set just enough so you can serve it without it falling apart, but not so long that it cools down. Scoop into bowls while it’s still steaming.
Serving ideas for warm chocolate lava cake
Serve this straight from the oven while it’s still warm.
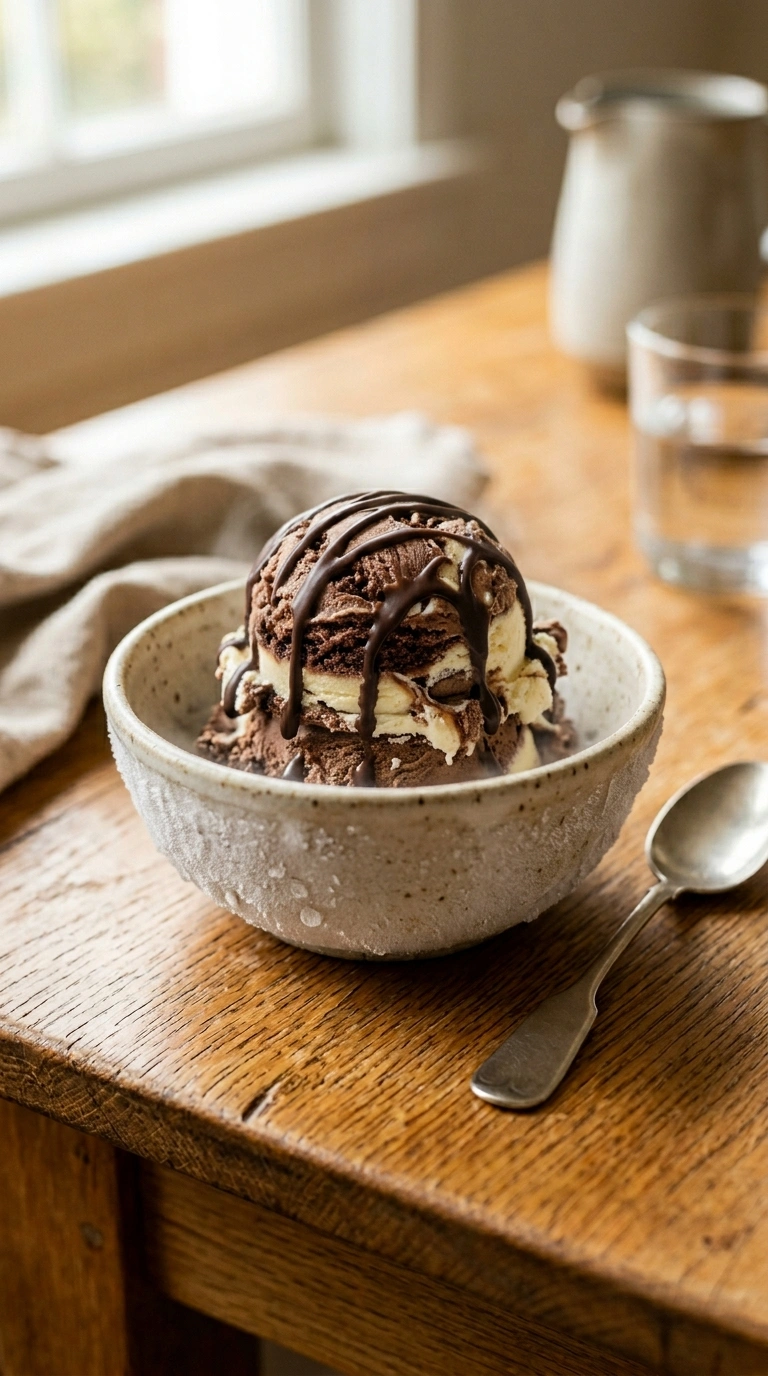
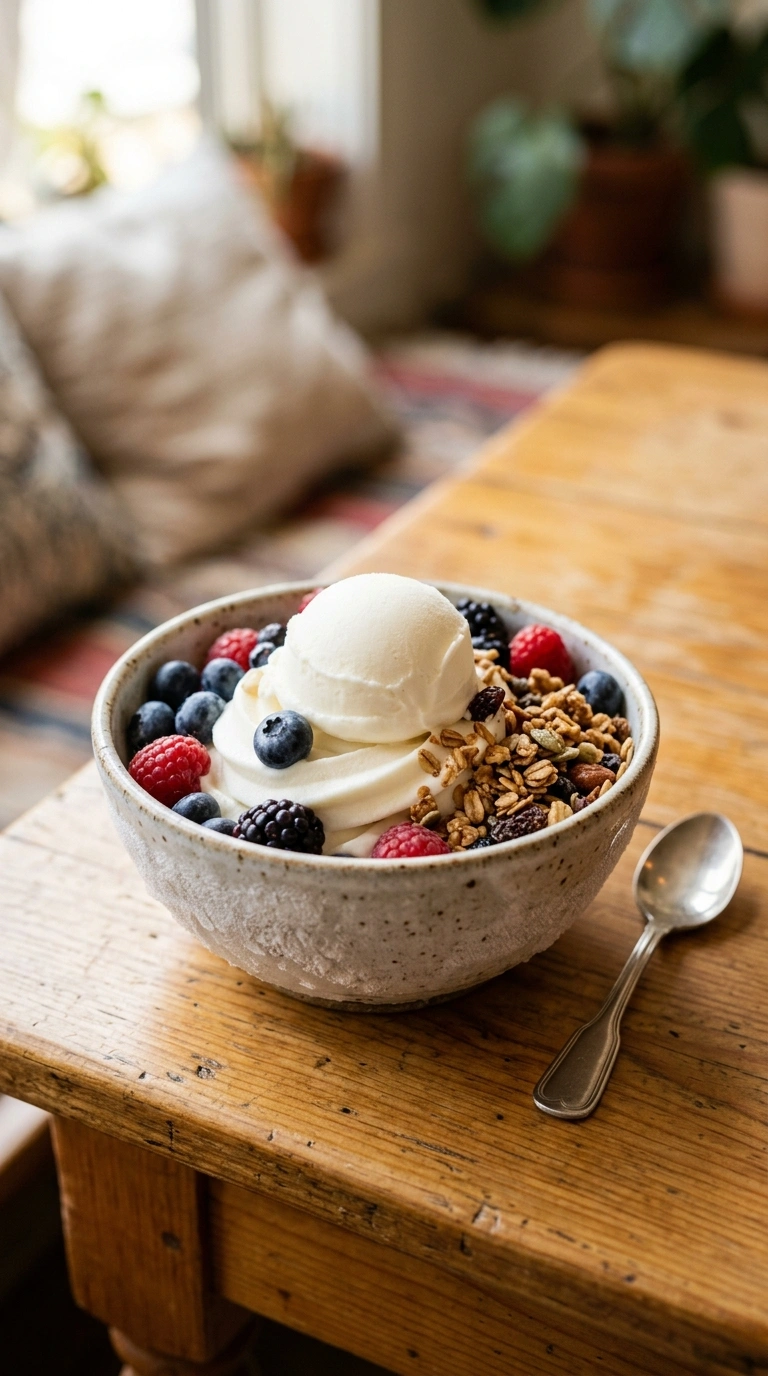
Vanilla ice cream on top
Vanilla ice cream melting into the warm chocolate center creates this amazing contrast—cold, creamy sweetness against the hot, almost bitter chocolate flow. The temperature difference is what makes it work. Scoop a generous portion right on top and watch it melt. That’s the whole experience right there.
Whipped cream and fresh berries
A dollop of cold whipped cream against the steaming cake is incredible. Fresh raspberries add brightness that cuts through the richness. The tartness of the berries balances the deep chocolate flavor perfectly. This pairing works especially well when you want something that feels a little lighter, though you’re still getting all the molten goodness from your warm chocolate lava cake.
Caramel drizzle with sea salt
Warm caramel sauce poured over the top creates layers of flavor—buttery, sweet, and then the salt hits your palate. The combination of warm chocolate and warm caramel is honestly unbeatable. Try it with our favorite dessert sauce recipes for more inspiration on drizzle options.
Frequently asked questions
Can you make warm chocolate lava cake ahead of time?
Yes, you can make the batter up to 4 hours ahead. Keep it covered in the fridge and bake it right before serving. The batter actually gets better when it sits because flavors meld together.
If you want to prep even earlier, mix all your dry ingredients the night before in an airtight container. Just keep the wet ingredients separate until you’re ready to bake. This cuts your active cooking time down to literally 5 minutes.
What if I don’t have semi-sweet chocolate chips?
Use dark chocolate chips if that’s what you have—they’ll make the cake richer and less sweet. Milk chocolate chips work too, but the molten center won’t have as much depth.
You can also chop up a chocolate bar into chunks. The exact size doesn’t matter as much as using quality chocolate. Honestly, this substitution often tastes better than chips because the chocolate melts more smoothly.
How do you reheat leftover warm chocolate lava cake?
Pop it in a 300°F oven for 3-4 minutes to warm it back up. Don’t use the microwave—it’ll make the cake tough and rubbery instead of tender.
If it’s already cooled completely, you can also slice it, place it on a plate, and microwave for just 15-20 seconds. That’s the bare minimum to warm it without destroying the texture. Real talk: it’s best eaten fresh, but these methods work in a pinch.
Why is my warm chocolate lava cake recipe not molten in the center?
You’re probably baking it too long. Pull it out when the top looks barely set but still jiggles slightly in the very center. The residual heat keeps cooking it for another minute after you remove it from the oven.
If you’re hitting 12 minutes and it’s still too solid, your oven might run cool. Try 350°F for 13 minutes next time. Every oven is different, so adjust by 1 minute increments. The first time you nail it, you’ll know exactly what to look for.
Final thoughts
You now know something most home cooks never figure out: the magic is in the timing, not the ingredients. Everyone assumes lava cake is complicated. It’s not. It’s actually one of the easiest desserts you can make once you stop overthinking it.
The first time I nailed this, my roommate literally sat there in silence for a few seconds. Then she asked if I’d secretly taken a culinary course. I hadn’t. I just stopped following recipes that told me to bake it at 425°F like some kind of dessert emergency.
Here’s what makes the difference: when you cut into that warm chocolate lava cake and the center flows out onto your plate, steaming and almost molten—that’s the moment. That’s when you realize you’ve been doing it wrong your whole life. The contrast between the set edges and that flowing center is what makes people ask for the recipe.
Try making this for someone you want to impress. Better yet, make it for yourself on a random Tuesday night. You’ll understand why everyone’s been asking you to bring dessert to every gathering. Check out more chocolate dessert recipes once you’ve mastered this one—you’ll be unstoppable.
Easy Warm Chocolate Lava Cake
Ingredients
Method
- Preheat your oven to 350°F. Mix the flour, cocoa powder, granulated sugar, brown sugar, baking powder, and salt in a large bowl. Whisk it together for about 30 seconds—you want everything evenly distributed. This step matters because lumpy cocoa powder ruins the texture of your warm chocolate lava cake.
- Melt the butter in a small saucepan over low heat. Add the eggs and vanilla extract to your dry mixture, then pour in the melted butter. Stir everything together until just combined—don’t overmix or you’ll develop too much gluten and lose that tender crumb.
- Fold in the chocolate chips gently with a spatula. You’ll hear the batter sizzle slightly as the warm mixture hits the chips. Add the milk and vegetable oil, stirring until the batter reaches a thick, pourable consistency. This is your moment to taste and adjust sweetness if needed.
- Grease a 9-inch round baking dish with butter or cooking spray. Pour the batter in and smooth the top with the back of a spoon. Don’t worry if it looks thick—that’s exactly what you want. The chocolate chips will sink as it bakes, creating those pockets of molten goodness.
- Slide the pan into the 350°F oven. Set your timer for exactly 12 minutes. I know that sounds short, but that’s the whole secret. Most people overbake because they’re nervous, then complain their warm chocolate lava cake turned into regular cake.
- When your kitchen starts smelling like warm, buttery chocolate with just a hint of caramel, you’re about 30 seconds away from done. That rich, toasty aroma is your signal. The top should look set but still slightly jiggly in the absolute center when you gently shake the pan.
- Remove the pan from the oven and let it rest for exactly 2 minutes. This is non-negotiable—it lets the structure set just enough so you can serve it without it falling apart, but not so long that it cools down. Scoop into bowls while it’s still steaming.