Most people think classic apple pie recipe requires some fancy pastry degree or hours of fussing. That’s the biggest lie about pie-making. I’m here to tell you that homemade pie isn’t complicated—it’s just misunderstood.
The smell of cinnamon and butter hitting a warm oven? That’s what makes people ask for your recipe before they even taste it. Honestly, that aroma alone makes the whole thing worth making.
Here’s the real truth: you don’t need to be intimidated. A proper classic apple pie recipe comes down to four things—good apples, real butter, the right temperature, and not overthinking it. Most recipes make you second-guess yourself at every step. Mine doesn’t.
If you’ve failed before, it wasn’t your fault. You probably followed advice that actually sabotages the final result. Bookmark this for your next weekend—this is the version that actually works.
What everyone gets wrong about classic apple pie recipe
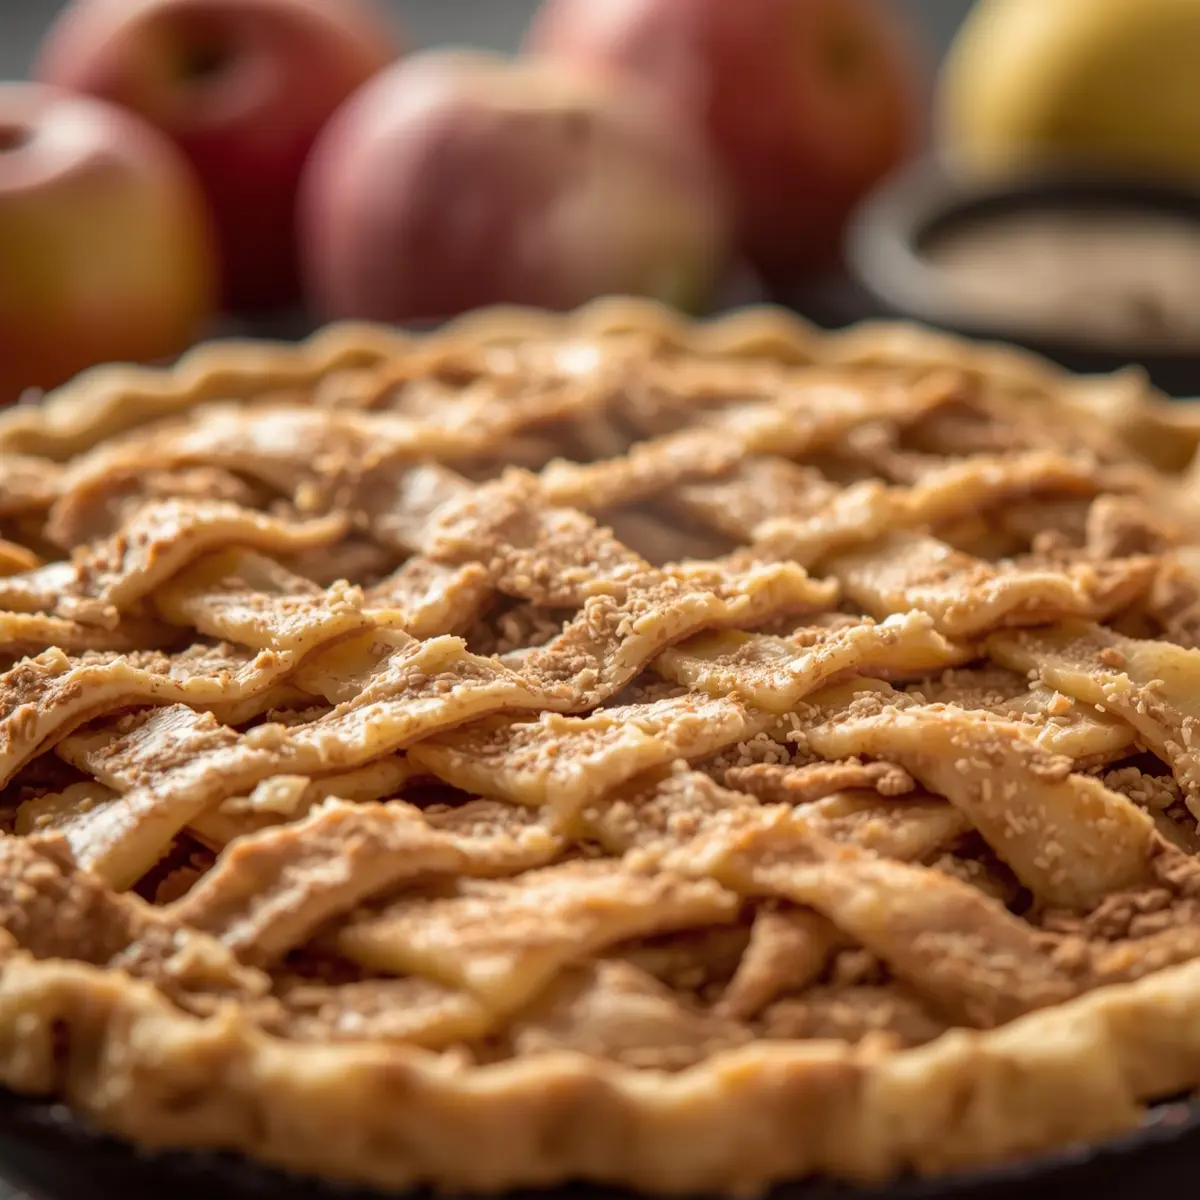
People think a flaky crust requires some magic touch or special technique that only professionals know. Wrong. The real problem? Most home bakers either overwork the dough or don’t chill it long enough. Both destroy flakiness before you even roll it out.
The conventional approach treats pie crust like bread dough—mixing it until it’s smooth and pretty. That’s exactly backwards. You want your dough slightly shaggy and lumpy. Those little butter pieces are what create those golden, crispy layers everyone craves.
Here’s what actually happens: overworked dough develops gluten, which makes your crust tough and dense instead of flaky. Add proper chilling time, and suddenly you’ve got a crust that shatters when you bite into it. That’s the difference between mediocre and memorable.
Benefits of the correct approach:
- Flaky, shattered crust texture instead of dense and chewy layers
- Filling stays put instead of leaking through a weak bottom crust
- Golden edges and crispy bottom without burnt spots or soggy centers
- Crust doesn’t shrink dramatically during baking—it holds its shape
Ingredients for classic apple pie recipe
- 2 1/2 cups all-purpose flour
- 1 cup unsalted butter, cut into 1/2-inch cubes and chilled
- 1/4 cup ice water
- 1 teaspoon salt
- 6 cups sliced apples (about 6 medium apples—Granny Smith or Honeycrisp work best)
- 3/4 cup granulated sugar
- 1/4 cup brown sugar
- 2 teaspoons ground cinnamon
- 1/4 teaspoon ground nutmeg
- 2 tablespoons fresh lemon juice
- 1 egg
- 2 tablespoons milk
The butter needs to stay cold—I’m talking straight from the fridge. Those little chunks of cold butter create steam pockets while baking, and that’s literally what makes your crust flaky. Room-temperature butter just melts into the dough instead.
Your apples should feel firm with a slight give when you squeeze them gently. Soft, mealy apples break down into mush instead of holding their shape in the filling. I always slice mine about 1/4-inch thick so they cook evenly but stay intact. Trust me on this—texture matters way more than people realize.
Step-by-step instructions
1. Mix flour and salt in a large bowl. Add your chilled butter cubes and use a pastry cutter or fork to break them into pea-sized pieces. This takes about 3 minutes—don’t rush it. You’ll see little butter flecks throughout. Add ice water one tablespoon at a time, mixing gently until dough just comes together. Chill for 30 minutes minimum.
2. Divide dough in half and roll one half between parchment paper until it’s about 1/8-inch thick. Transfer to a 9-inch pie dish. Trim edges, then chill for 15 minutes while you prep the filling. Roll the second half for your top crust and chill it separately.
3. Toss your sliced apples with both sugars, cinnamon, nutmeg, and lemon juice in a large bowl. Let this sit for 5 minutes—you’ll hear the mixture start to bubble slightly as the sugar dissolves and creates juice. This is exactly what you want. The apples will soften just enough without getting mushy.
4. Preheat your oven to 425°F. Pour the apple mixture into your chilled crust, mounding slightly in the center. Don’t worry if there’s liquid in the bottom of the bowl—pour about half of it over the apples. Save the rest for later.
5. Place your second crust on top and seal the edges by pressing them together with a fork. Cut 4 small slits in the top for steam to escape. Mix egg and milk together, then brush this egg wash over the entire top crust. Sprinkle a pinch of cinnamon sugar on top if you’re feeling fancy.
6. Bake at 425°F for 20 minutes, then reduce heat to 375°F and bake for 30 more minutes. When your kitchen smells like caramelized cinnamon and buttery apples—that’s your signal the filling is done. The crust should be deep golden brown, not just light tan. If edges brown too fast, cover them loosely with foil.
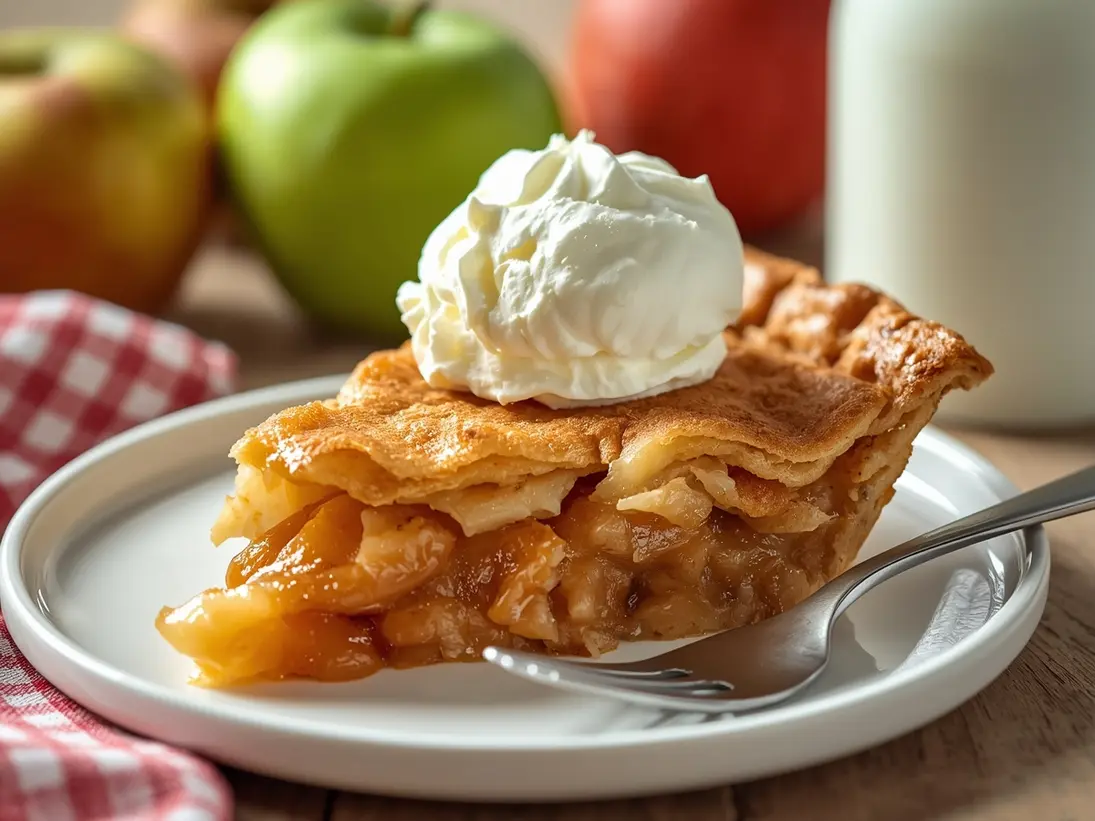
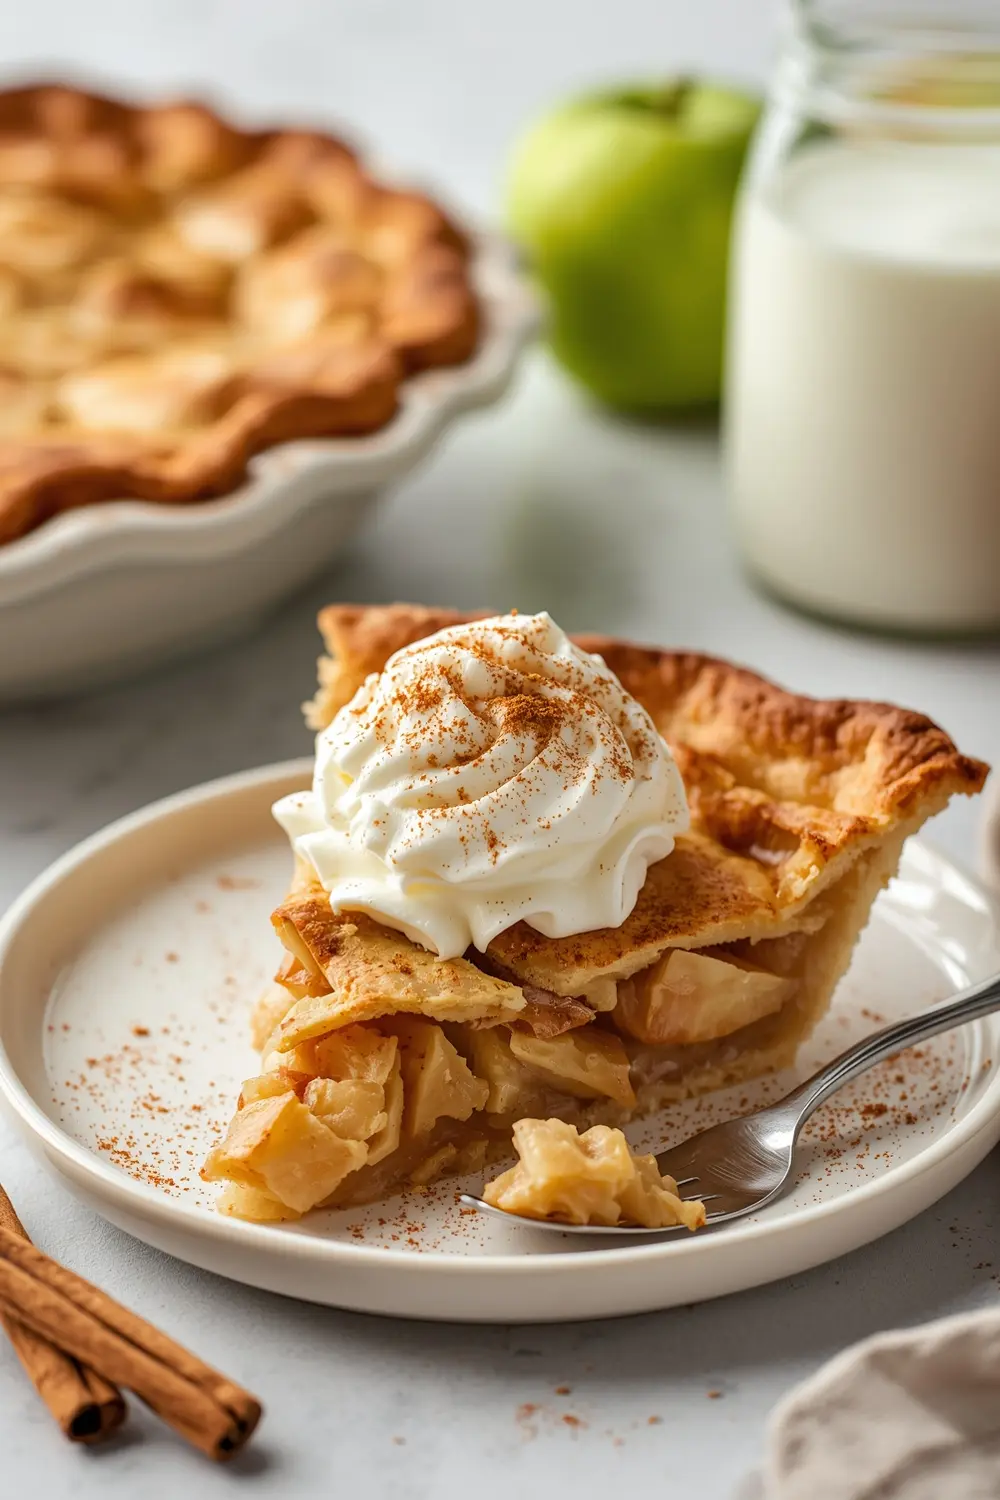
7. Remove from oven and let cool on a wire rack for at least 2 hours before slicing. I know it’s torture to wait, but cutting into a warm pie makes it fall apart. After 2 hours, it holds together beautifully. The filling sets up and the crust firms up enough to slice cleanly without crumbling everywhere.
Serving ideas for classic apple pie recipe
Serve your classic apple pie warm or at room temperature—both are incredible for different reasons.
Vanilla ice cream with warm pie
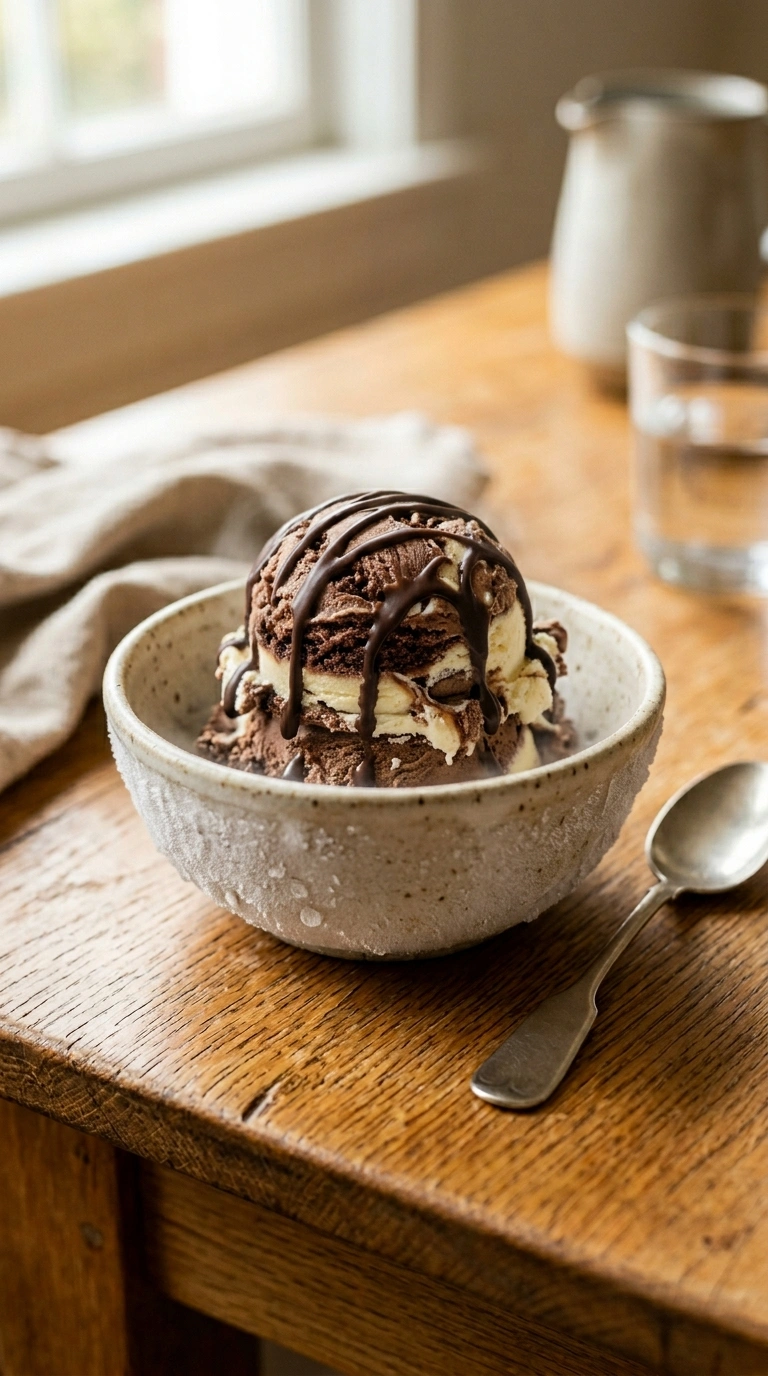
Slice your pie while it’s still slightly warm and top with cold vanilla ice cream. The contrast between crispy-edged crust and melting ice cream is exactly why people come back for seconds. The cold against warm creates this texture play that just works. If you love dessert pairings, try our garlic butter shrimp recipe for contrast inspiration—same principle of temperature and flavor balance.
Whipped cream and cinnamon
Dollop fresh whipped cream on a slice and dust with a little extra cinnamon. The cream’s silky texture against the crispy crust layers is perfect. Not too heavy, not too light—just right for afternoon dessert or after dinner.
Caramel drizzle with sea salt
Drizzle warm caramel sauce over your slice and sprinkle a tiny pinch of fleur de sel on top. The sweet-salty combination makes the cinnamon-apple flavor pop even more. This version feels fancy but takes literally 30 seconds to plate.
Frequently asked questions
Can I make classic apple pie ahead of time?
Yes, you can bake it up to 2 days ahead. Store it covered at room temperature or in the fridge. Reheat at 300°F for 15 minutes before serving if you want it warm again. The crust stays crispy and the filling stays tender.
Cold pie actually tastes great straight from the fridge too. Some people prefer it that way because the filling firms up and slices cleaner. Either way works perfectly.
Can I freeze classic apple pie before baking?
Absolutely. Assemble the entire pie, cover it tightly with plastic wrap, then foil, and freeze for up to 3 months. Bake from frozen—just add 15 extra minutes to the baking time. Don’t thaw it first or the crust gets soggy.
I’ve done this dozens of times and honestly it works better than baking fresh sometimes. The flavors actually develop more while frozen. Just pull it straight from the freezer to the oven.
What apples work best for classic apple pie?
Granny Smith apples are the gold standard because they stay firm and slightly tart. Honeycrisp apples add sweetness and hold their shape too. Mix them together for the best texture and flavor balance.
Avoid Red Delicious or Gala apples—they get mushy and don’t have enough tartness. Your filling needs that slight tang to balance the sugar.
How do I prevent a soggy bottom crust on my classic apple pie recipe?
Pre-bake your crust at 425°F for 10 minutes before adding the filling. This creates a barrier that stops moisture from soaking through. It’s the single best trick for a crispy bottom.
I learned this the hard way after making soggy pies for years. That 10 minutes changes everything. Your bottom crust stays golden and crispy instead of becoming a wet, dense mess.
Final thoughts
You now know something most home bakers never figure out: the crust is everything, and chilling time beats fancy technique every single time. That’s the secret nobody talks about because it’s not exciting or complicated enough to make a story about.
The real magic happens when you bite into a slice and feel that crispy, shattered crust give way to tender apples and warm cinnamon filling. The butter melts on your tongue, the apples taste bright and slightly tart, and suddenly you understand why people have been making this dessert for generations.
Stop thinking of classic apple pie as intimidating. It’s actually the easiest way to look like a baking genius. Your friends will ask for this recipe, and you’ll smile knowing it’s simpler than they think.
If you want more cozy comfort desserts that don’t require fancy skills, check out our collection—it’s full of recipes that prove homemade doesn’t mean complicated. Make this pie this weekend and taste the difference proper technique makes.
Easy Classic Apple Pie
Ingredients
Method
- Mix flour and salt in a large bowl. Add your chilled butter cubes and use a pastry cutter or fork to break them into pea-sized pieces. This takes about 3 minutes—don’t rush it. You’ll see little butter flecks throughout. Add ice water one tablespoon at a time, mixing gently until dough just comes together. Chill for 30 minutes minimum.
- Divide dough in half and roll one half between parchment paper until it’s about 1/8-inch thick. Transfer to a 9-inch pie dish. Trim edges, then chill for 15 minutes while you prep the filling. Roll the second half for your top crust and chill it separately.
- Toss your sliced apples with both sugars, cinnamon, nutmeg, and lemon juice in a large bowl. Let this sit for 5 minutes—you’ll hear the mixture start to bubble slightly as the sugar dissolves and creates juice. This is exactly what you want. The apples will soften just enough without getting mushy.
- Preheat your oven to 425°F. Pour the apple mixture into your chilled crust, mounding slightly in the center. Don’t worry if there’s liquid in the bottom of the bowl—pour about half of it over the apples. Save the rest for later.
- Place your second crust on top and seal the edges by pressing them together with a fork. Cut 4 small slits in the top for steam to escape. Mix egg and milk together, then brush this egg wash over the entire top crust. Sprinkle a pinch of cinnamon sugar on top if you’re feeling fancy.
- Bake at 425°F for 20 minutes, then reduce heat to 375°F and bake for 30 more minutes. When your kitchen smells like caramelized cinnamon and buttery apples—that’s your signal the filling is done. The crust should be deep golden brown, not just light tan. If edges brown too fast, cover them loosely with foil.
- Remove from oven and let cool on a wire rack for at least 2 hours before slicing. I know it’s torture to wait, but cutting into a warm pie makes it fall apart. After 2 hours, it holds together beautifully. The filling sets up and the crust firms up enough to slice cleanly without crumbling everywhere.